
In this section I will show you how to set up the template you are downloading from my website. This tutorial is made in Joomla 3.x, however the backend for Joomla 2.5 is almost identical, just the design is different.
I assume that your Joomla system is already installed, with or without sample data. If you don’t have sample data installed, don’t worry, I will show you how to set it up from scratch.
Ok, so you have choose a template and already downloaded to your computer. Now let’s see where to start.
Step 1 – Install the template
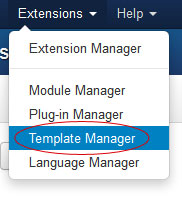
Login to the administration panel of your Joomla website and go to Extensions > Extension Manager

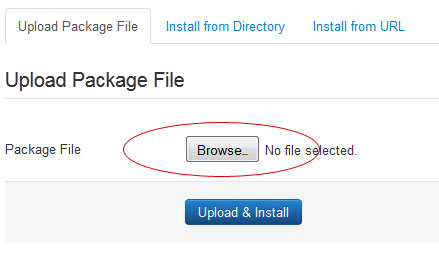
Select the template file you downloaded earlier and install it to the website.
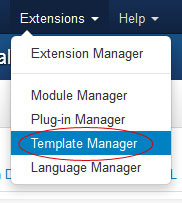
If the installation went fine, and you see the “Success” message, go to Extensions > Template Manager
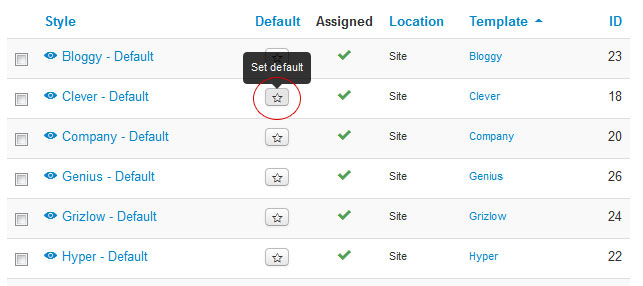
Find the template you installed and set it as Default design
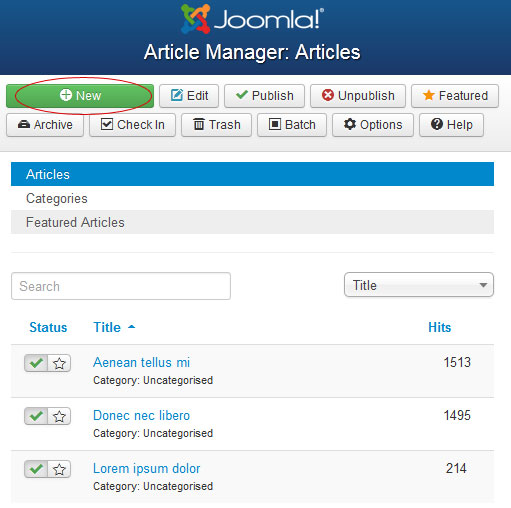
Step 2 – Create Articles
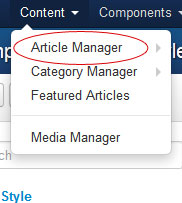
Now go to Content > Article Manager to start adding your content
Create an article by clicking on the NEW button.
Give a title to your article, select a category (if you don’t have any category, just create some before you start adding your articles), upload images and insert to the content, save your article. In the Publishing and Article options tab there are lots of other features, that will not be a part of this tutorial, but you can try out different settings and play around with them.
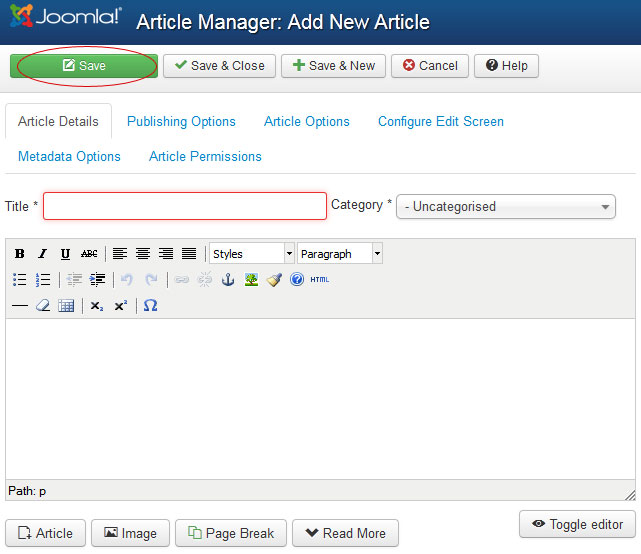
If you want a cickable Featured Image for your article that will link to the article itself (see the template demo), right in the article editing you can upload the Intro Image. This is a very cool features to use in a blog section.

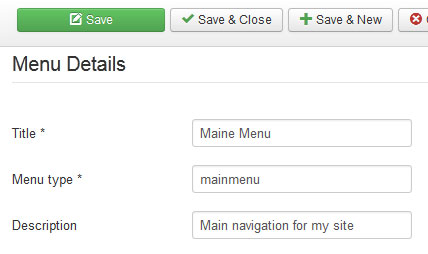
Step 3 – Create Menus
Only after you have at least one article, you are ready to create the menus. Go to Menus > Menu Manager and create a new menu category

Here is an example on how should you set up a menu category:
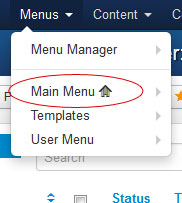
After you added your menu, go to Menus > Your Custom Menu and start adding menu items. As you can see in the following picture, you can have multiple menu categories, this is useful if you want to place different menus to different module positions. For example you can have a main menu at the top of the page, and a second menu at the footer.
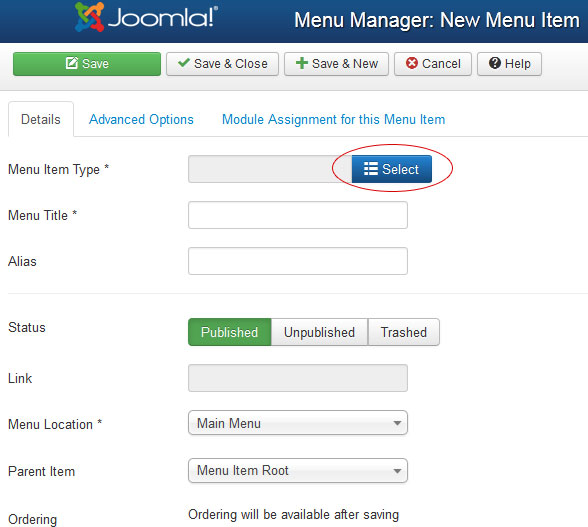
Adding menu items is quite easy: select the Menu Type (single article, blog, contact, etc…), add the title and save. If you want sub-menus, just choose the Parent Item for your current menu, and will automatically be added as a sub-level. Save the menu, and repeat this step until you have all your menus ready.
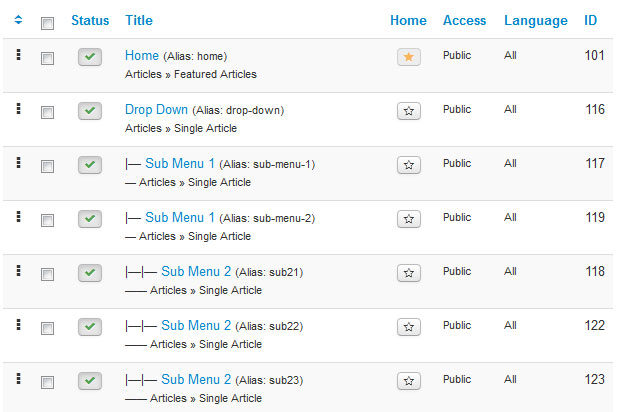
Here is an example of how the menu structure should look with sub-items:
Ok, now we are done with this part, let’s move to modules.
Step 4 – Create Modules
Menu Module with Sub-Menus
Let’s start with the Menu Module, because this is the most important module of a website (in my opinion)
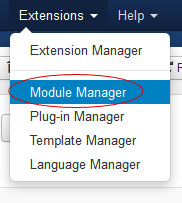
Go to Extensions > Module Manager, create a new Menu Module
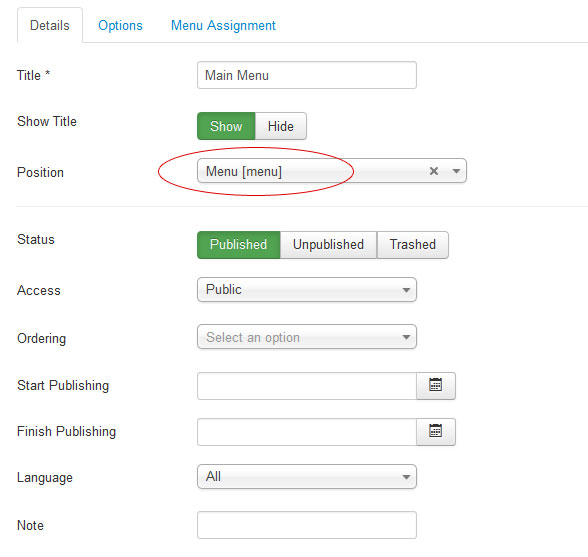
 Add the title to your menu, so you can identify it easily, and choose a Module Positions for it. If you are using one of our templates you should place the main menu to the “menu” position.
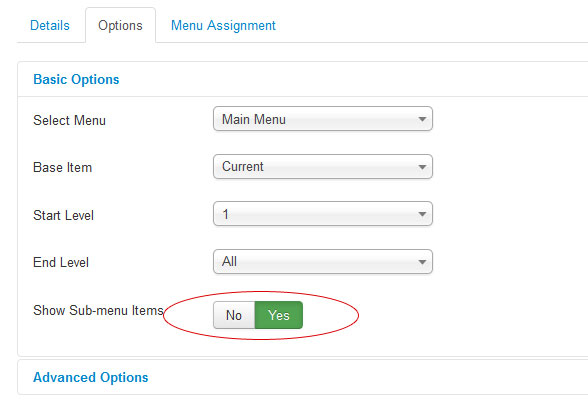
If you have sun-menus and want to enable the nice drop-down effect, right here in the menu module, click on the Options tab and set the Show Sub-menu Items to YES.
Custom Class Modules
Our templates have lots of module positions where you can publish modules. We won’t go over each positions, but will show you how to set up the custom colored modules that comes with the template design. You can add the pre-made custom style to any module type, and you can make your own style if you know CSS.
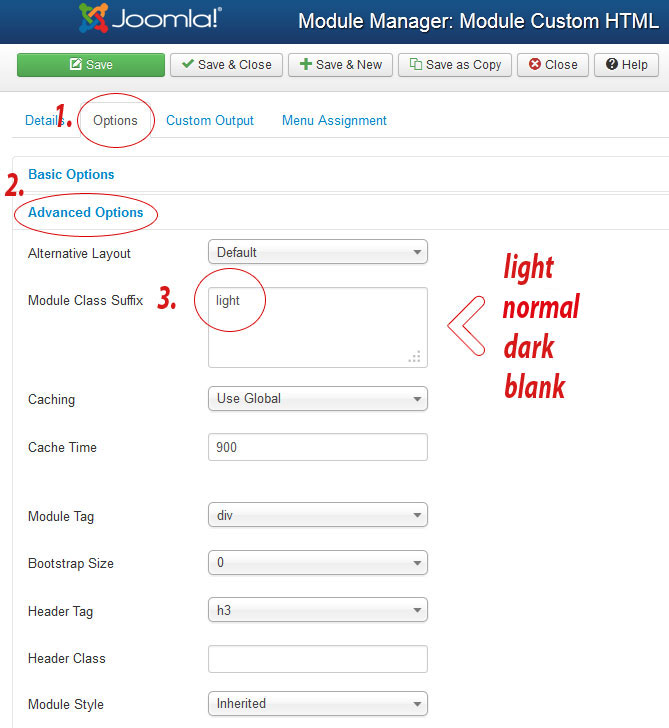
Into the module editor go to Options Tab > Advanced Options and in the Module Class Suffix write one of the classes that are already included in our templates: light, normal, dark, blank – just like in the image below:
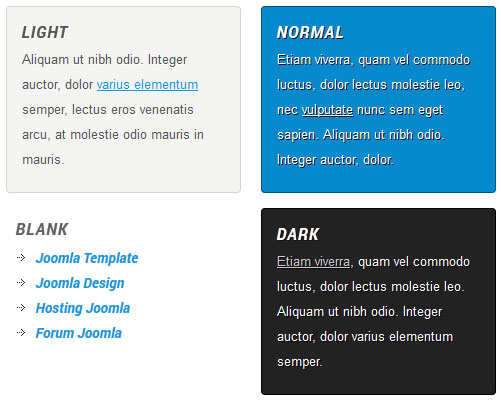
Depends on template design, custom styled modules will look similar to these:
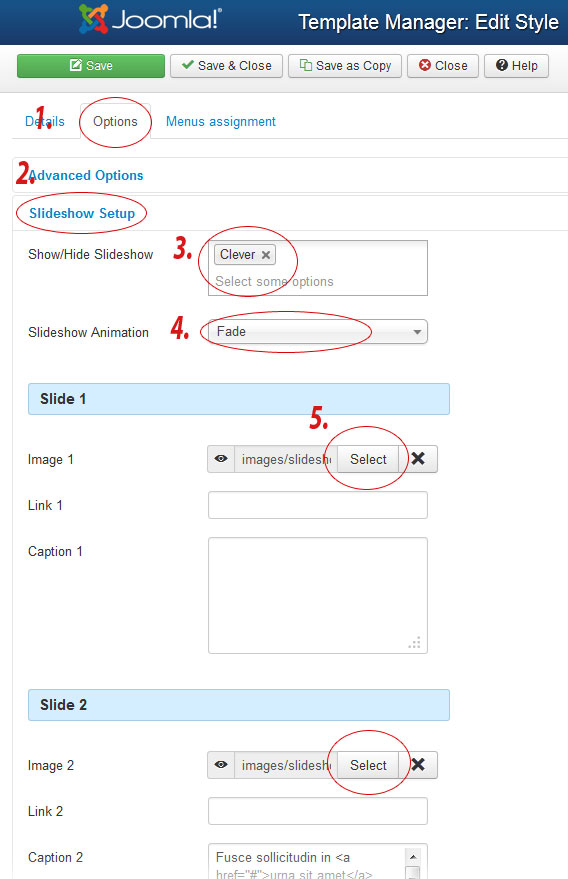
Step 5 – Image Slide Show
You can install a slideshow module if you wish, but if you are fine with the incorporated image slider that we added to the template, than follow the tutorial.
Now go back to Extensions > Template Manager and select the Template Style you installed before.
Go to the Options tab > Slideshow Setup, select the menus where you want to enable the slideshow (I like to use the slideshow on homepage only), select the slideshow animation, upload your images, see following image:
I know this tutorial is very long, and probably confusing for those who are new to Joomla, but I really hope after all this, that you will be able to set up not only my, but any other Joomla template.
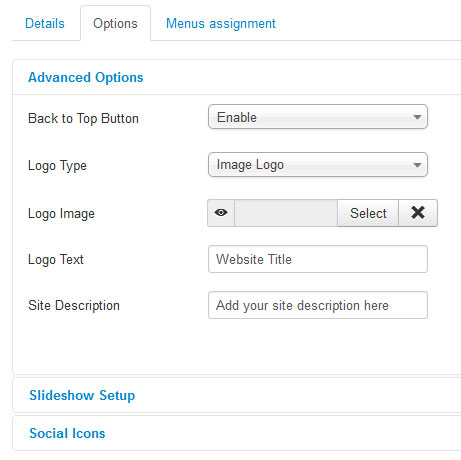
I would like to also mention few more things. My templates always come with parameters, so you can customize it fast and easy. In the Advanced Options tab you will be able to enable or disable template features, upload your own custom logo image, or if you don’t have one, just choose the text logo and add the text you want to show instead of the logo image. You can add also site description, that will appear under the logo, and probably will add new parameters to the upcoming templates.
I would like to mention that my templates comes with 10 in-build social icons (I have included only the ten most popular sites). In the Social Icons tab just insert the url of the particular social page ie. https://facebook.com/your.name and the icon will automatically appear on the site.
For now, this is all. Hope it is helpful and easy to understand. If you have any other questions, don’t hesitate to ask using the comments system on this page.
Have fun!!!